Horseshoe Falls, Mt Field National Park – Tasmania, Australia

Be prepared for stairs.

I’m just going to go right out and say that. While Horseshoe Falls are just a short distance (10 minutes or so) from Russell Falls on the Mt Field National Park waterfall circuit, the hike to them requires a bit of resilience.

LADY BARRON FALLS, MT FIELD NATIONAL PARK – TASMANIA, AUSTRALIAHorseshoe Falls are the second stop on the waterfall circuit at Mt Field. You will have to pass either Lady Barron Falls or Russell Falls first in order to get to them, depending which way you start. Check out those blog posts to figure out which would suit you best.

Myself and my hostel friends Ben and Yiwii from The Pickled Frog Backpackers (review in the footnotes of O’Grady Falls blog post , if you prefer a hotel try Hotels.com for comparison prices) began from Russell Falls. They ventured ahead of me, climbing up the stony stairs that zig-zag through the unique Tasmanian forest.

I didn’t count how many stone stairs there were, but there was a bench about half-way up, so that’s an indication that there’s enough stairs to require a rest. Safe to say I was huffing and puffing like my life depended on it. Well, it probably did.

Luckily the climb is made easier by the beautiful views you have surrounding you.

And then we hit the wooden stairs, of which there were 105. One hundred. And five. So yeah, be prepared for that, is all I’m saying.

The climb is well worth it, though. I had hoped it would lead to the top of Russell Falls, and I was right.

We were able to look out at the view from the river that flowed down into the falls we’d just been admiring minutes before. So that was pretty cool.

The river looked surprisingly small for the incredible flow at Russell Falls, but it was pretty nonetheless. It trickled by us with that classic, soothing sound of gentle water.

We continued on to Horseshoe Falls. Since the tracks are within a National Park, they’re well signposted. We laughed at the ‘1 minute’ engraved on the sign below. Almost doesn’t seem worth putting it there, does it?

Because sure enough, 1 minute later, we reached Horseshoe Falls.

As you can see, these falls get their name from the shape formed by the two sides of water flowing down into the river below. They were extremely luscious and green when we visited, which we relished. They’re not always like this, so consider this your disclaimer warning!

I was again able to practice my photography skills, enjoying the mossy green rocks I had to play with.

I then forced my new friends into taking photos of me once again. Well, actually they quite enjoyed it to be fair. In fact they were encouraging, and captured some killer ‘behind the scenes’ shots for me. They were legends.


Photo by @buzzpuppet

Photo by @buzzpuppet

As you can see, I set up the camera angle and adjusted the settings, making sure everything was perfect. The only real credit I can give to my new-found friends was them directing me on where to stand and how to pose. So I guess I have them to thank for that. Love you, guys!

I enjoyed Horseshoe Falls, though I wish they were flowing a little more to make that horseshoe shape more distinct.

We then began our journey to Lady Barron Falls, the longest and hardest part of the hike (which is still easy). Lady Barron Falls are 50 minutes from Horseshoe Falls and an hour from Russell Falls, with a Tall Trees walk on the way.

Quick Facts

Last visit June 2017
Best TimeJuly-September 
Start / FinishMount Field Visitor Centre 
Unsealed Roads No
Walking distance 1.2kms one way, circuit
Time 45 minutes one way, or 2hrs for circuit
DifficultyModerate, stairs involved
FacilitiesToilets & Cafe at visitor center
Lat & Long42.6763° S, 146.7116° E
NearbyRussell Falls and Lady Barron Falls (circuit)
Watercourse Russell Falls Creek

Want to subscribe?

Never miss out on a waterfall chase by entering your email below!

Recent Posts

Find me on Facebook

Image of Russell Falls taken on a chasing waterfalls trip in Tasmania

Russell Falls, Mt Field National Park – Tasmania, Australia

Image of Russell Falls taken on a chasing waterfalls trip in Tasmania

I was a little on the drunk side of sober.

Perched on a bar stool at The Pickled Frog Backpackers with my laptop in front of me, editing photos of O’Grady Falls and Silver Falls which I had visited just that day. I took a swig of my Cascades Pale Ale.

The next thing I knew, a bustle of people were filling the foyer, ordering drinks and giggling at the bar next to me. A short girl appeared to my right, leaned over to peer at my screen and exclaimed, “What are you doing?”

Soon enough, I had made friends with the small girl named Yiwii, who was from New York but travelling on from a business trip in Manilla. We were then joined by a guy called Ben, who was also from Melbourne. And by the end of the night, they’d both invited themselves on my next day trip to Mt Field National Park.

But I didn’t mind. Making new friends and having unexpected company with fellow travellers is one of the most fantastic things about travelling solo. So I welcomed them into my tiny little Kia, which I hired from Drive Car Rental (see footnotes for a full review), and off we went.

Photo by @yiwii featuring me and my Kathmandu backpack – so many great pockets for my essentials.

Driving to Mt Field from Hobart was easy – and the track to the falls begins from the Mt Field Visitor Centre. The drive took about an hour and a half and was relatively easy – even on the long, windy Tassie roads. To get there from Hobart City:

  • The easiest way to leave the CBD is by taking Brisbane Street to National Route 1
  • Continue on National Route 1 for 17.5km
  • Continue straight through the first roundabout – follow signs for Lyell Hwy A10 and follow this for 15kms
  • Continue straight at the next roundabout onto Lyell Hwy A10/Montagu Cres/A10 and follow for 1km
  • Continue straight at yet another roundabout onto Montagu St/B62 and follow this for 18kms
  • Then turn left onto Gordon River Rd B61 and follow this for 7.5kms
  • Turn right onto Lake Dobson Rd/C609 (this is the road entering into the Mt Field Visitor Centre)


The Mt Field Visitor Centre will cost you $24.00AUD entry (for a National Park Pass). You can drive in and park your car without any issues, but you will then need to purchase the pass from reception to put on your dash.

The walk to Russell Falls is one of the easiest in Tasmania. Once inside the Visitor Centre, head to the exit on the opposite side of the carpark, through the glass doors. You will be led to an obvious path, and see the sign above.

Shortly, a big blue sign leads the way. The waterfall track is a circuit of three falls including Horseshoe Falls and Lady Barron Falls. Obviously this means you can do the track the opposite way, too. If you’d like to do this, begin at the track for Lady Barron Falls, which can be accessed by following the road that passes the Mt Field Visitor Centre carpark (on foot). You’ll see the entrance quite clearly. Anyway, we began the easy way below:

The walk is flat and super easy, winding through a forest where bright green moss clings to everything in sight. Colourful, information signs are scattered along the track. I was extremely excited because this one below said that winter is the most likely time to see a platypus (I didn’t see one, sadly).

My new friends ventured ahead of me, through huge fallen trees.

There’s places to stop and sit along the way, although with the easy track I doubt you’d need to.

I always make sure to read the signs on the side of the track. You learn so much about the  place and the wildlife surrounding you.

Beautiful, green ferns danced around us and fluorescent green moss dazzled as it clung to fallen logs and rocks.

We took our time to stop and enjoy the wildlife, even though we were freezing in our thick, puffy jackets. It’s pretty cold up at Mt Field – in fact it gets layered with snow at times, so be sure to take appropriate gear and rug up!

We continued on – this track is only a 25 minute return so ‘continued on’ wasn’t actually that much further.

Another informative sign.

And then we made it!

Russell Falls had a big, wide, open viewing platform, and then a sneaky small platform off to the left where you could get closer to the falls (pictured below).

Russell Falls are about 34-58 meters in height (with 2 tiers/drops) and usually flow very well in winter/spring time. We were visiting in June, which would be considered prime-time, but Tassie was experiencing a severe lack of rainfall, so they weren’t flowing as much as they could have been.

They were still pretty beautiful though, with the incredible tiers/cascades providing excellent views and of course, photographs.

I think these were my favourite, to be honest. They’ve got to be up there. Their uniqueness and beauty captivated me.

And there I am, soaking in these gorgeous falls.

It was hilarious sharing my crazy passion for waterfalls with new friends, succumbing them to pressing the shutter release button on my camera for me. They did a pretty good job, don’t you think?

I almost didn’t want to continue on to Horseshoe Falls. Almost.

But it was time to move on. I took one last glimpse at these gorgeous falls which – fun fact – were first named Browning Falls when they were discovered in 1856. However, by 1884 tourists had flocked so frequently and they were re-named Russell Falls – the popular tourist attraction.

And then it was time to make our way to Horseshoe Falls, and later Lady Barron Falls.

Footnotes

I hired a small car from Drive (also known as Rent For Less) Car Hire, which is located on Harrington Street in Hobart CBD. My experience was really great – though my advice would definitely be to book online rather than walking in. It is significantly cheaper to book online. This was also the cheapest car hire I could find, and the location in the CBD made it even easier in terms of accessibility.

Lucky for me The Pickled Frog Backpackers had free parking. A review of this hostel can be found in the footnotes of the post on O’Grady Falls.

Quick Facts

Last visit June 2017
Best Time July-September
Start / FinishMount Field Visitor Center
Unsealed Roads No
Walking distance 500meters return (wheelchair accessible). Full circuit 
Time 25 min return (unless  circuit)
Difficulty Super Easy
Facilities Toilets
Lat & Long 42.6772° S, 146.7129° E
NearbyCircuit continues to Horseshoe Falls and Lady Barron Falls
Watercourse Russell Falls Creek

Want to subscribe?

Never miss out on a waterfall chase by entering your email below!

Recent Posts

Find me on Facebook

Silver Falls, Mt Wellington Park, Hobart – Tasmania, Australia

This is where I went wrong.
I began my journey to Silver Falls already tired from my walk to O’Grady Falls, with 50% phone battery (although it was ok because I had a portable charger in my bag). You see, it’s possible to do O’Grady Falls, Strickland Falls and Silver Falls all in the same day because they’re quite close to one another on Mt Wellington (see below). If you have access to a car, I would suggest driving to Fern Tree, parking and walking up the Pipeline track near Saint Rapheal’s Church to get to Silver Falls. But here’s the way I went.

Map indicating Silver Falls, O'Grady Falls and Strickland Falls. Google Maps (2017).

I began my walk from O’Grady Falls, continuing down the mountain rather than heading the opposite direction up to Pinnacle Road. I passed the Woods Track off to my right (above) and appeared at a small clearing. The O’Grady Falls Track continues off to the right.

And the Rivulet Fire Trail heads downhill to the left. I paused and tried to decide what to do. I checked the map on my phone. Strickland or Silver? Silver or Strickland?

I was unsure whether to continue to Strickland Falls (down the Rivulet Fire Trail) however, you can only see the falls from a distance from this trail, with no access to their base. I decided to turn around and head on the Woods Track, because Silver Falls were only 2km away.

I figured I could always walk back and see Strickland Falls, then pop out at Huon Road and get a metro bus back into Hobart. Yes, I thought. That was a good plan. So I headed uphill.

Uphill was the killer. I was quickly out of breath (super unfit at this point) and had to ‘take 5’ on a log, munching on my banana and muesli bar. It was at this point I noticed a leech on my camera bag. So yeah, there’s leeches around this area – beware!

After what seemed like a lifetime of trudging uphill, lifting my heavy hiking boots one after another, I finally reached some stairs up to Pinnacle Road. At this point I was gasping for air, which was sharp and cold when it filled my lungs. So I plonked myself down at the top of the stairs and scooped a Woolworths salad into my mouth followed by copious amounts of water. (Never forget to bring sufficient snacks and water when you go on a day trip).

I’m not going to lie, at this point I was so exhausted I was contemplating whether to keep going. I glanced across the road at where my maps was telling me to continue – along the Fern Glade Track. It seemed it was more uphill.


The Woods Track intersects Pinnacle Road and The Fingerpost Track, Google Maps. (2017). 

But I had come so far. Triumphed up the Woods Track. I found a sudden source of energy and sprung to my feet. Looking both ways twice before I crossed the road, I began up the Fern Glade Track. While it was uphill at first and I felt my glutes and calves burning, shortly after the track levels itself out and no longer requires a strenuous hike uphill.

Along this track you can also deviate to Rocky Whelans Cave and The Springs via Fingerpost Track. Soon along the track you’ll see the path to The Springs (there are lots of ways to get to The Springs on Mt Wellington) off to the right.

There are lots of signs along this trail, which instead of being helpful can actually become rather confusing if you’re not sure where you’re headed. The Fingerpost track intersects with the Fern Glade Track, so you’ll have the option to turn left or right onto this trail if you want. To get to Silver Falls, ignore this and continue straight.

(On Google Maps it still calls the Fern Glade Track a continuation of the Woods Track at this point).

Sign indicating the Fingerpost Track.

Follow the signs for Fern Tree and The Springs.

Soon you’ll hit the Radfords track, which runs through like an intersection. This is another track to follow if you’re keen on The Springs.

The Woods Track/Fern Glade Track meets The Radfords Track and officially becomes the Fern Glade Track, Google Maps. (2017).

For Silver Falls, continue straight ahead onto the Fern Glade Track (pictured in the distance of the below image).

A key indicator of if you’re in the right place is this headstone, which appears on the right hand side of the above photo. It marks the spot where George H. Radford died whilst competing in the race to the Pinnacle on September 19, 1903.

This meant nothing to me at the time – apart from being slightly spooky all alone in this deathly quiet forest – but after some research I found a great article of the history of the race and the tragedy. If you’re keen you can find it here.

Shaking off the element of spook, I continued on the Fern Glade Track. (Google now sorts itself out and calls it the Fern Glade Track from here on in).

There was a change in scenery once I entered the ‘official’ Fern Glade Track. There was more tree cover and an increasing amount of dark green moss clinging to everything in sight. I apologise for the dark images – but it gives you an idea of the mood.

Monstrous fallen trees that had been ripped from their roots lay to the sides of the track. I found myself wondering what it would have been like the moment they fell. They would have caused an almighty, frightening crack.

I was then thankful for the clear weather I was experiencing. The track then began to descend quite vigorously, and I found myself realising there was no way I would be heading back up it. I hoped that after Silver Falls I could find my way back to a main road to get myself back to Hobart.

But it wasn’t time to worry about that yet. Downhill I went, winding my way through thick greenery and across many small bridges.

All in all I would say this track is moderate in difficulty – half quite drastically uphill and the other drastically down, with a small segment of flat in between the two. Quite the accurate definition of moderate really.

It was deadly quiet along this trail, winding down, down, down the mountain. I felt uneasy, all my senses pricked up and alert. I had the crazy feeling that I was being watched. The headstone had me rattled.

If I thought O’Grady Falls was the trail of bridges, I was yet to experience this one. There were plenty of them hovering over small, intricate streams that were barely filled with water. I would imagine after heavy rainfall these would be full and flowing.

Finally I popped out at the Reservoir Trail, which is a horseshoe-bend at this point.

The Fern Glade Track continues on the other side (below). However, if you want to find Silver Falls, don’t continue down here. Head to the right, up the Reservoir Trail. And be careful – this is a shared use track.

The Fern Glade Track meets The Reservoir Trial and The Silver Falls Track, Google Maps (2017).

Heading up the hill:

Soon you’ll reach a wide clearing. The confusing (and also pretty great) thing about Mt Wellington is the copious amount of walking trails available. They all intertwine and intersect, so it provides hours of walking pleasure for keen hikers. However, it also means you need some pretty accurate directions in order to get from A to B.

The clearing has entrances to the Middle Track (either left or right) and the Silver Falls Track.

The Reservoir Trail meets The Middle Track and The Silver Falls Track, Google Maps (2017).

The Reservoir Trail continues around a bend off to the left and becomes the Middle Track, where there’s a tank-like building. I assume for some sort of water catchment.

Then, the Silver Falls track runs off to the left. This will lead you back towards the Fern Glade Track and eventually reaches Pillinger Drive.

On the opposite side of the clearing (to the right) the Silver Falls Track leads you to Silver Falls. Hooray! (So confusing, right?) I was lucky I had my phone to direct me.

So obviously I continued on the Silver Falls Track towards Silver Falls. After an easy, flat walk I found myself at a fork in the track.

The track on the right, on the higher ground, is the Reids Track, which leads back to Radfords Track and Pinnacle Road.

The Silver Falls Track meets The Reids Track, Google Maps. (2017).

The other, on the left – Silver Falls!

A small descent begins, and I could spot further signs in the distance. Finally I was in the right place.

A staircase appears and rounds down to the right.

And I finally reached the falls.

There’s a water collection tank at these falls, which you obviously can’t and aren’t meant to access.

Continuing down the wooden staircase, I reached the base of Silver Falls. Due to lack of recent rainfall, they were only a thin trickle. But I didn’t mind. I had made it!

I experimented with many angles of these falls, trying to capture their intricate beauty. I’ve named them “crimped” falls in my mind, because they reminded me of crimped hair.  A classic 90s kid memory.

These falls spill over the edge of a rather level rock face, and into a concrete-looking base. I had a hard time working out whether they were natural or man-made.

Perhaps they had been altered to assist with the water catchment.

In any case, they were well worth the trek. I was glad I decided to continue on. I took my time taking photos and trying not to freeze in the chilly air in the process. My phone was on 20% battery, but I wasn’t worried. I had brought my brand new portable charger with me.

After marvelling at the falls, I decided it was finally time to leave. I had no idea how to get back to civilisation, so I fished through my backpack to find my charger. I felt around in the mesh pocket, searching for my white iPhone cord. I started to panic. It wasn’t there. And then I remembered – I had used it to charge my phone the previous night in the hostel.

So there I was, on the side of Mt Wellington, with a no idea how to get back to Hobart, a phone on 20% – nope, now 19% -, a portable charger on 100%, and absolutely no way of using it to charge my phone.

Safe to say I was angry at myself. Fat lot of good a charger is without the cord, Annabel. But I had to calm down. I decided to continue on the track, across a small bridge that allows a front-on view of the falls, and downhill. I hadn’t come this way, so I had no idea where it led. But it had to go somewhere, right?

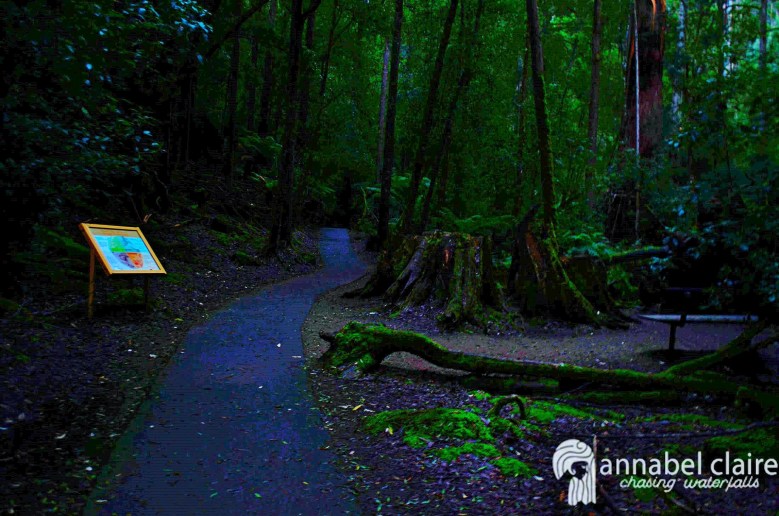
Soon I reached a small clearing with options to head left or right on the Pipeline Track. This clearing was accompanied by huge metal water tanks, and a small, very old shelter and picnic area with rotting wood off to the right. There were plenty of ‘historical’ information signs around here, but I was a tad too anxious/panicky to read them.

The Silver Falls Track meets The Pipeline Track, Google Maps. (2017).

Something possessed me to take the track to the left, so I did. Trudging along, there were no signs to help me out. The track was gravel and flat and wide, like a road. I had no idea where I was heading and I could feel my heart pumping faster. I didn’t want to use my phone to map anything in case I needed it to call someone for help.

Soon I was walking alongside a proper road, where I could see cars whizzing by. Well, I wasn’t so much alongside as I was elevated-next-to it. I wasn’t able to reach the road from this track. But the road was a good sign, so I continued on.

The Pipeline Track runs alongside Huon Road, Google Maps. (2017).

And then I hit Huon Road and popped out in the suburb Fern Tree. I felt relief wash over me. Everything was fine. I had been so close to civilisation all along! (This also means to get to these falls you could drive to Fern Tree – there’s a carpark across the road from the track – or get the metro bus).

The Pipeline Track leads to Fern Tree, Google Maps. (2017).

There was a bus stop right next to the Pipeline track, to the right. I checked the times. Buses came every hour. My eyes flicked around, frantically trying to decipher when the next bus was due. 2:49pm. I checked the time. It was 2:47pm.

I couldn’t believe my luck. If I had been a minute later. If I had dwaddled back at the track. If I had taken the time to read the historical signs. If I had taken a few minutes longer to decide which way to go. I would’ve been stuck in the cold, on the side of a mountain, waiting for the 3:49 bus.

But I wasn’t. I was lucky. I was an idiot – but I was a lucky idiot. The bus pulled up and the kind female driver let me have a concession fair using my Uni Melb student card, which cost me $2.30 to get back to Hobart (full fare is $3.30 AUD). I sat on the bus in the warmth, relaxing my muscles as I realised that everything was going to be A-okay.

Moral of the story? Always check the bus times, and plan your trip before you go. Know (roughly) where you are heading (I mean it’s always fun to explore), but at least know how you’re planning to get back to shelter and safety. And last, but not least, always check you’ve packed all your supplies before you go!

Quick Facts

Last visit June 2017
Best Time June-September
Start / Finish O’Grady Falls or Fern Tree Pipeline Track
Unsealed Roads No
Walking distance 4km return
Time 1-2hrs
Difficulty Moderate
FacilitiesFern Tree has toilets, tavern, bus stops
Lat & Long 42.9206 E 142.2504 S
NearbyFern Tree, O’Grady Falls, Strickland Falls
Watercourse Browns River

Want to subscribe?

Never miss out on a waterfall chase by entering your email below!

Recent Posts

Find me on Facebook